Eyebrows furled, I lay on the massage table as the masseuse was pressing in between my eyes with his thumbs. Relax. Just relax. Over and over again I was commanding myself to relax without any progress. Then, a quiet voice whispered in my head, “let go, and you will go deeper still.”
Until that moment I didn’t realize that my body, not just my brows, was tense and clenched as I was demanding my body to do relaxation. The invitation I found was to let go, and simply be. With my next exhale I physically and metaphorically let go.
How we show up for one thing is how we show up for everything. We’re constantly putting demands on our bodies to “chill out,” “just relax” or “get over it.” But, I wonder if there’s something we can learn in untraining ourselves from constantly doing and instead create space for letting go and simply being.
From the day we’re born we’re learning to balance this fight or flight response both physically and emotionally. Crossing the street, we halt when we hear a car peeling around the corner. Our body physically braces itself when we trip and fall to the ground. Emotionally, it happens too. That discernment or gut feeling we have when we walk into a room and our heightened senses tell us ‘”something isn’t right here,” “this isn’t safe, let’s go.”
In yoga, it’s taught that the physical manifestations of our fight or flight response — these emotions of trauma, stress, anxiety, and fear — are held in the hip area of our bodies, specifically in the psoas muscle. If your life seems riddled by fear, anxiety, endless to-do lists and stress, then chances are your hips are very tight.
Not to mention, we are a chair-bound culture. Most of us are sitting in chairs at a computer for most of the day which further tightens and shortens the hip flexors and surrounding muscles.
Today we’re going to work on opening our hips to create a deeper release in our psoas muscles and encourage what we’ve been creating the past few weeks: stress relief. This area of our body holds so much tension and protects our bodies, but as many of us with tight hips know, when our hips are tight it impacts the rest of our body, as well. We’re programmed to do, do, DO. But the biggest challenge of hip openers is letting go. It’s much less about doing and so much more about being and surrendering.
Let’s begin.
First start with our 15 minute stress relief warm-up. After you’ve completed both Sun A’s and Sun B’s meet us in Downward Facing Dog.
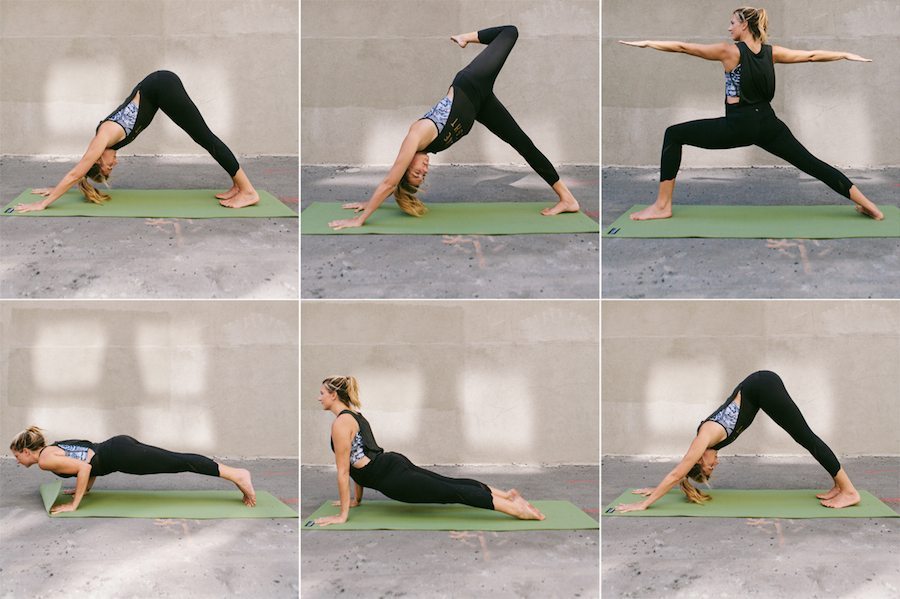
- From Downward Facing Dog, inhale and lift one leg and as you exhale, bend knee and open your hip. Stay for one 2 cycles of breaths.
- EXHALE. place foot in between hands, spin back heel down, creating a 45 degree angle with the back foot.
- Find Warrior II, with hips open and front knee bent to 90 degrees if possible. If your hips are tight, find a wider stance with your legs. Stay for 5 breaths.
- As you exhale, place hands on either side of your front foot and move through Chaturanga Dandasana – Upward Facing Dog as you inhale and Downward Facing Dog as you exhale.
Repeat on other leg.
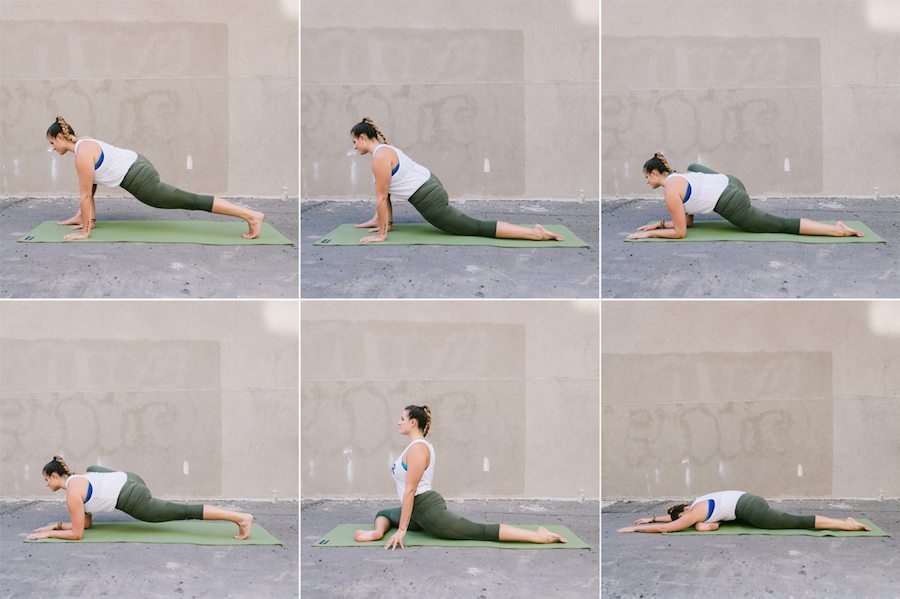
Next, from Downward Facing Dog, place right foot outside right hand for Lizard Pose. Stay for 5 breaths. Option to lower back knee to the mat if you feel any discomfort. Keep your core engaged to prevent pelvis from sagging which can lead to low back injuries.
If possible, lower to your forearms and try both options with back leg, keeping the leg down on the mat with toes uncurled or tucking your toes, engaging the leg and lifting it off the mat. See what works best for your body. Stay for 5 breaths.
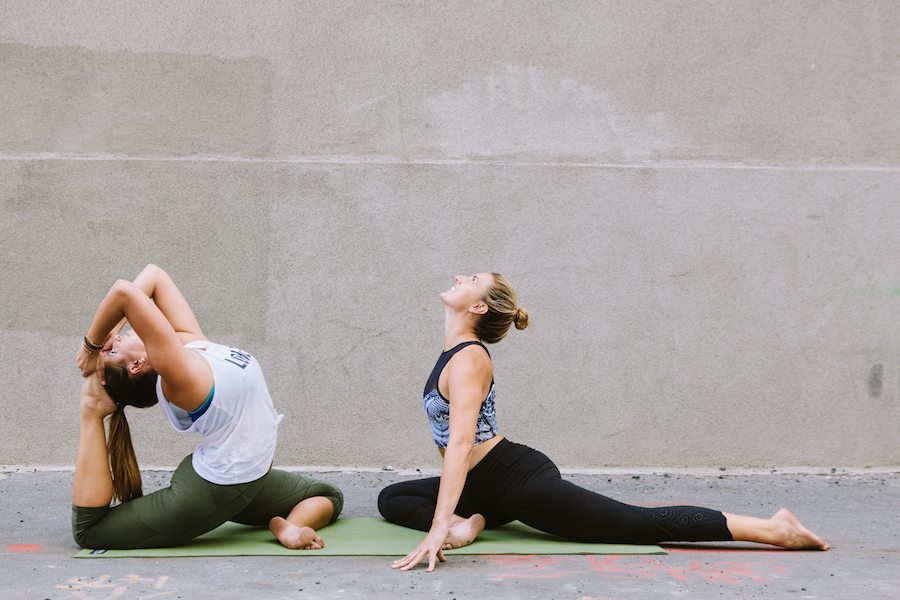
- Walk your right foot toward your left hand and let the knee drop to the mat, preparing for Pigeon Pose. It’s imperative to practice Pigeon Pose in excellent alignment, as poor alignment can lead to many injuries.
- Pelvis should be in neutral position, with both hip points facing forward. If you’re feeling tight or uncomfortable, prop yourself up with a cushion or blanket(s) under your right hip so your hips find a neutral point.
- Start with right foot close to your body (not pictured), with your heel touching your left hip. With practice and time, begin moving your foot forward to form a 90 degree angle with your shin (parallel to the short side of the mat). This angle greatly intensifies the lengthening of the piriformis muscle (outer hip), so move gently and give yourself time.
- Flex your right foot and press the outer edge of it into the ground, activating your outer hip. Try pressing your big toes into your palm so you can feel where the activation should be coming from.
- Back leg is straight behind you with toes uncurled and relaxed. The top of your thigh, shin and foot are grounded on the floor.
Once alignment is secured, slowly walk your hands forward until you’re completely folded over your right leg. Stay for 10-20 breaths.
To come out of Pigeon Pose, walk your hands toward your front shin, curl your back toes under, press into your hands and transition into Downward Facing Dog. Pedal out your feet as needed.
Repeat cycle of Lizard Pose to Pigeon Pose on left side.
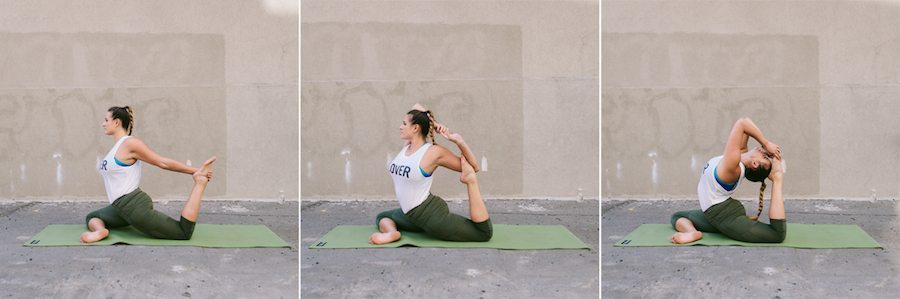
Options / Variation for Pigeon Pose:
Pigeon Pose Variation: With right leg in front, bend left knee behind and reach for it with your left hand, encouraging your hips to stay as square as possible.
Mermaid Pose: If possible, let your left foot rest in the nook of your elbow crease. Extend your right arm overhead, maintain an energetic lift from your pelvic floor (Kegel muscles) and reach for your left hand. Stay for 5-10 breaths.
One-Legged King Pigeon Pose: In Pigeon Pose, continue sending your tailbone down and crown of the head up. Encourage your torso to lengthen by securing your hands on either side of your hips. Lift your right arm up, engage your core, bend your elbow and reach back for your flexed, right foot. Lengthen the crown of your head up and allow your neck to mindfully bend back to gaze behind you. Stay here or move forward by finding balance and stability without the support of the left hand on the ground. Send the left arm up and back so both elbows are pointing upwards and both hands are holding your right foot. Continue lifting from your pelvic floor to prevent collapsing into your low back (lumbar spine). Breathe and slowly release one hand at a time before bringing your neck to a neutral position.
Follow the same steps listed above when transitioning between sides.
What’d you think? We’d love to hear your thoughts, and if you have any questions whatsoever, leave a comment or email us: info@therefinedwoman.com
Photos via Sara Kerens; Tutti del Monte; Kat Harris of The Refined Woman